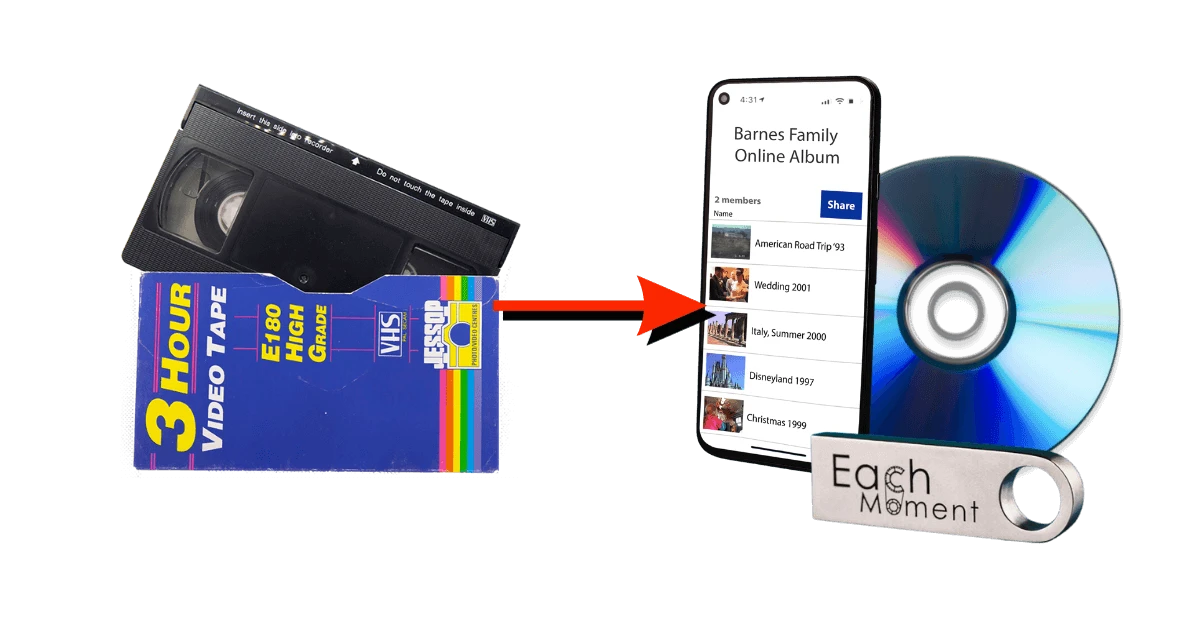
EachMoment converts all kinds of VHS tapes, including S-VHS, VHS PAL, VHS NTSC, and all variety of camcorder tape.
Our Memory Box system is the safest way to digitise VHS in the UK.
- Free collection and re-delivery by the UK’s most secure courier.
- Free cleaning and restoration by our team of specialists.
-
Free crush-proof Memory Box.
Why Digitising Your VHS is Important
VHS |
Digital memories |
|---|---|
| They take up room in the house and can feel messy. Just more stuff to dust! | Fit in the palm of your hand. Once your tapes are digitised, you’re free to dispose of them. Now you have more space in your home. |
| Often can’t be viewed or shared anymore. With VCRs becoming rare and unreliable, tapes are increasingly just a shelf-full of pointless plastic. | Easily enjoyed on smartphone, computer, or smart TV. Now you can actually watch your precious memories! Instantly share with loved ones, wherever they are in the world. |
| Cannot keep your memories safe. VHS is easily lost in the event of household accidents such as fire or flood. They’re often the only copy of important family memories, so if they are lost, those memories are gone forever. | Ultimate protection for your memories — Once they’re digital, you can make infinite backups of your memories. They can also be stored in the cloud. This means that your memories are protected no matter what happens. |
| Actively puts your memories in danger — VHS are deteriorating. As tapes age, they will succumb to fading, mould, and other issues that eventually make them unusable. Memories stuck on them will be lost if they’re not rescued. Sadly this is not a question of if but when. | Keeps your memories safe forever — your precious memories cannot degrade when they’re digital. They’ll be accessible a hundred years from now, and will look as good as they do on the day they’re digitised! |
How to convert VHS to Digital and DVD
Option 1. Professional digitisation — easy & safe
1. Fill up a Memory Box
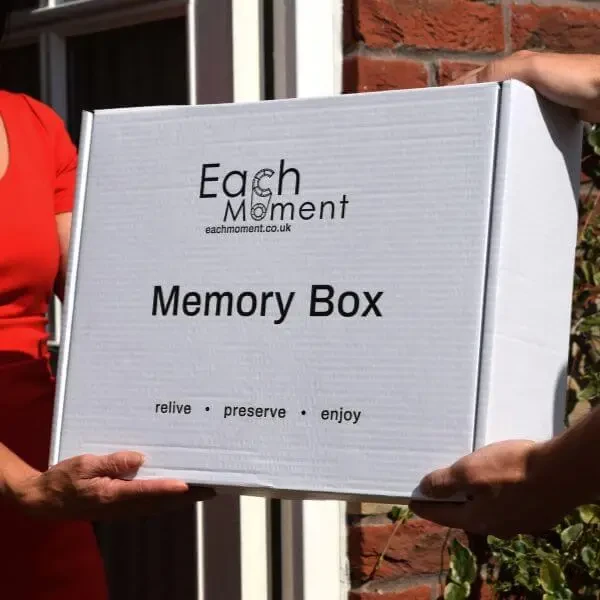
• The crush-proof Memory Box arrives on your doorstep the day after you make an order.
2. We digitise
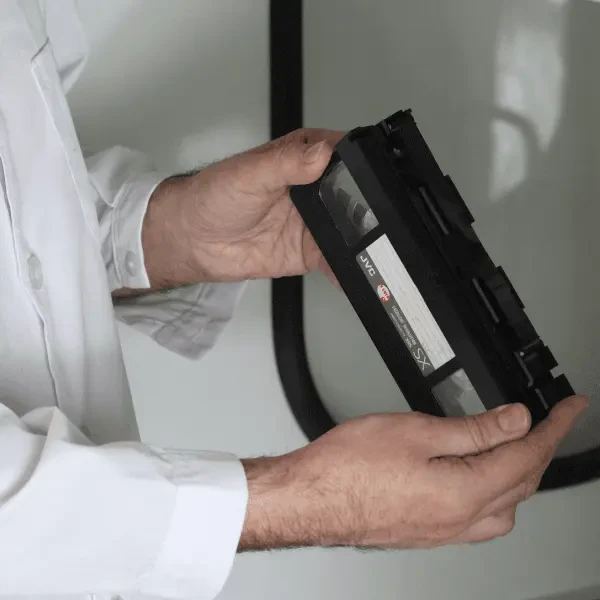
• Our lab’s specialist restoration team safely clean & repair every tape that needs attention for free.
• We safely digitise your memories to the best possible quality. Choose to enjoy them on memory stick, DVD, or online album.
• The same high-security courier returns your Memory Box with your safely preserved digital memories, as well as your old tapes.
3. Enjoy your digital memories

• Now you can easily share and relive precious memories on any digital device, such as smartphone, tablet, computer, or TV.
• Feel secure knowing that your memories are safe forever. They will look as good in a hundred years as they do on the day they’re digitised, ready to be passed down the generations.
Option 2. DIY (Digitise It Yourself)
Of course, we’re biased when it comes to this option. There’s no point hiding that we’d prefer you to choose our professional digitisation service. We’ve dedicated a lot of time to making EachMoment the safest way to digitise, not to mention the most convenient. It’s also how we make a living!
But how you digitise your VHS is a decision you have to make yourself. So we just do our best to help you make an informed decision.
Therefore before we get straight into the how-to of DIY digitisation, it’s important to cover the pros and cons. Read on to help decide whether DIY or professional is the right method for you.
Pros |
Cons |
|---|---|
|
Potentially cost-saving.
Professional digitisation services are not cheap. It’s a technology and labour-intensive process. To ensure absolute safety requires significant investment; EachMoment constantly invests in safety protocols, equipment and training. Buying your own equipment can potentially save money:
The final total outlay depends on variables such as the quality you wish to achieve and what equipment you already have. |
But not always…
As you can see, the potential outlay for DIY digitisation is nothing to sniff at. Depending on how many tapes you have, it can be equivalent or greater than the cost of professional digitisation. It depends on your scenario. For example, if you only have 3 tapes, the minimum outlay is more expensive than having it done for you. Or say you want top quality. The minimum ~£500 outlay is only barely justified if you have more than 48 tapes, which is EachMomen’ts largest Memory Box size (though it can fit more). At this point, you would more-or-less breakeven, although that doesn’t account for your time and labour. Any fewer tapes and it makes more financial sense to employ EachMoment, who guarantee the best possible quality no matter what you spend. |
|
You learn a set of new skills.
There’s no putting a number on this. We’re biased, of course, but we think digitisation is really interesting! If you like technical endeavours; being careful and deliberate; as well as working with your hands and your mind, you’ll get a lot out of learning to digitise your VHS. |
It’s time-consuming.
There’s no getting around it. Any of the experienced technicians at EachMoment will tell you that their first few batches of VHS tapes too a long time to get through. There’s a lot to learn and you can’t rush it, because one mistake can mean lost memories. Our technicians are all extremely good at their jobs now so they can be much more efficient. It doesn’t hurt that they have access to industry-best equipment, either. |
|
You’ll be stuck with equipment you no longer need.
Remember how you wanted to digitise your tapes in order to have less pointless stuff lying around? Well, now you’ve digitised, you’ve got a lot of stuff to either give away or stick on eBay. |
|
|
It can risk your memories.
The technicians at EachMoment are experienced, highly-trained, and have access to the best equipment. We’re proud to say that we have never had an item become lost or damaged in all our years of doing business. We’re sorry to be blunt, but the fact is that inexperienced amateur digitisers do pose a risk to their VHS tapes and the memories on them. |
Weighs the pros and cons and see if you feel that DIY digitisation is the right method for you. If it is, read on for our expert guide on how to do it as safely as possible.
Guide to VCR equipment
The first challenge when digitising video tapes is finding good equipment. VCR players weren’t the most reliable devices when they were new, let alone decades old.
A typical issue that arises with poor equipment is bad synchronization caused by physical shuddering between the internal components. You may have experienced this issue for yourself if you’ve ever tried to copy a tape from one consumer-grade VCR to another, leading to a wavy or jittering picture. This is known as ‘flagging’, with the top 10-20% of the image being most affected.
The worst thing that can happen, of course, is destruction of the tape. Misaligned, dirty, or worn tape heads, belts, and rollers can all cause this to happen.
For smooth transfer, we recommend using regularly-serviced, broadcast-quality Video Cassette Recorders (VCRs) with Time Base Correction. This is the only kind of VCR that the EachMoment lab uses.
These specialist VCRs correct syncing issues and are far less likely to chew up tapes due to their superior build quality. A Time Base Corrector (TBC) automatically fixes shaky and blurry footage so that it can be digitised at the best possible quality. Explore for yourself and make sure to discuss with vendors, but some excellent examples to start off your independent research include:
- Thomson Scenium VTH-7090
- Panasonic AG-5260E
- and if you’re really serious, JVC BR 7000
If you must use a consumer-grade VCR, the following VCRs are known for their durability and overall build-quality. While they are not absolutely optimal for safety and smoothness, they are likely to give an okay transfer:
- Panasonic NV-FJ620
- Sony SLV-N71
- JVC HR-S9800U
- Mitsubishi HS-U448
- Philips VR550
Guide to Video Capture Devices
The two main things to consider with video capture devices is their compatibility with your computer —be it Mac, Windows, or Linux — and its connection types. Ideally, it will support both RCA and S-Video. If you haven’t got these cables, don’t worry. It’s simple enough to buy them from high-street consumer electronics stores or online retailers.
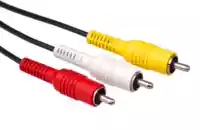
RCA
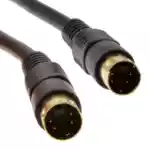
S-Video
Make sure to determine what you need from your video capture device. Here are some popular devices with their respective pros and cons for you to consider:
-
Elgato Video Capture
- Pros: user-friendly; supports both Mac and Windows; provides high-quality video capture.
- Cons: pricy.
-
Diamond VC500
- Pros: relatively affordable; supports a wide range of video formats.
- Cons: the accompanying software might be a bit complex for beginners.
-
Hauppauge USB-Live2
- Pros: comes with a set of robust features; supports a wide variety of operating systems; can be found for a bargain used.
- Cons: the setup can be complex.
Guide to Video Capture Devices
When it comes to VHS-to-digital software, the domestic user has three main things to consider: user-friendliness; editing capabilities; and format flexibility. To the first point, it will be necessary to consider your own tech-savviness honestly.
On the one hand, many VHS owners grew up before the computer age and therefore may not find the computer-based activities intuitive; on the other hand, if you’re embarking on digitisation in the first place, you may well be comfortable with new technical challenges. Make sure to consider where in this spectrum you lie and analyse user reviews of VHS-to-digital software accordingly.
To the second point — editing — a digitisation lab like EachMoment can afford to separate its editing software and pay dedicated editors, but the individual will likely not want or be able to do this. If you already have editing experience and software, great! But if not, make sure the VHS-to-digital software you pick has it built-in and is neither too complicated for you nor too basic for your needs.
Here are some well-regarded software for you to consider:
-
Elgato Video Capture Software
- Pros: offers an easy-to-use interface; compatible with both Mac and Windows; and provides good quality video output.
- Cons: limited editing tools.
-
Roxio Easy VHS-to-DVD
- Pros: features a decent set of editing tools; allows for direct burning to DVD.
- Cons: only available for Windows; pricy.
-
VidBox Video Conversion Suite
- Pros: supports both Mac and Windows; offers a straightforward process for video conversion.
- Cons: editing options are bare-bones.
How to…
Okay, let’s assume your equipment is all sorted and you’re ready to digitise. What now? Well, let’s get into it!
How to Inspect Your VHS
One of the keys to top quality digitisation is to make sure your tapes are ready for digitisation! The first thing is to inspect them. You’ll need the following:
- A clean, well-lit workspace
- Magnifying glass (optional, but useful)
- A pencil or pen for manual tape winding (if needed)
Step 1: Check externally
Before you even remove the VHS tape from its case, inspect the case itself for signs of mould, water damage, or severe scratches. Check the plastic shell of the cassette for any cracks, warping, or broken parts. Check the see-through windows for any signs of mould.
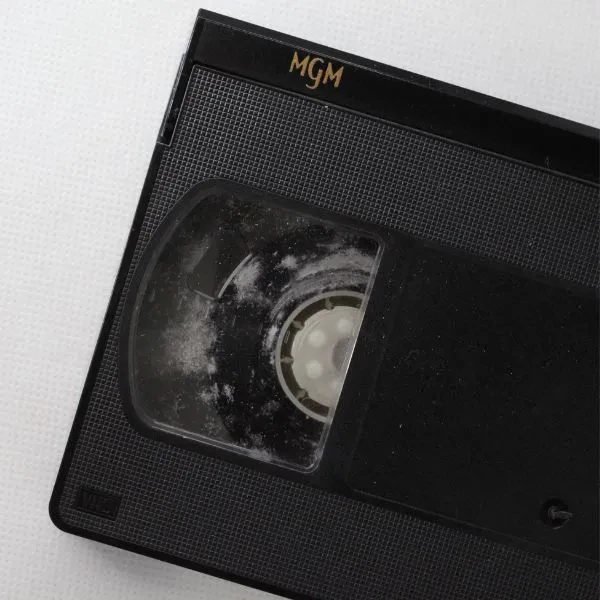
In the photograph above, the mould is extensive and easy to detect, but this is not always so. Make sure to take a close, careful look at all of your VHS. You’re looking for small white or green dust-like spots on the inside of the container and the tape itself.
If you detect mould at this stage of inspection, for now you should skip step 2 for the affected tape/s. Put it to one side or label it so that you know this is a mouldy tape.
If the case or cassette shows signs of damage, it’s likely that the tape inside may also be affected. If it is, put it to one side or label so that you know which are your good tapes and which are bad.
Step 2: Check internally
Open the case and gently remove the VHS tape. It is quite simple to take a VHS cassette apart. Simply unscrew the back, grip it so that it does not fall apart, and flip onto its other side before removing the case. In the ‘How to Clean Mould From Your VHS’ section below, there is a video which contains a clear illustration of this procedure.
If you see mould or detect a musty odour, these are signs of damage that could affect playback quality or even damage your VCR. Make sure to move any tapes with mould to a ventilated area and do your best to not agitate the tape, which can cause the mould to release spores. You do not want to breathe these in as they are toxic.
Step 4: Check the Reels
Make sure the tape is evenly wound and that there are no visible signs of crinkling, tearing, or uneven layers.
Step 5: Manual Tape Winding
Use a pen or pencil to gently wind the tape forward and backward a bit by inserting it into the notches of the reel.
Feel for any resistance or hear for any unusual sounds. Resistance or noise could be an indicator of damaged or tangled tape.
Step 6: Check the Tape Surface
Open the front protective flap of the VHS tape carefully.
Use a magnifying glass if available to inspect the tape surface for any mould, dirt, or physical damage.
Step 7: Check for Stickiness
Carefully touch the exposed tape surface.
If the tape feels sticky, it may suffer from ‘Sticky Shed Syndrome,’ which requires professional attention for restoration.
How to Clean Mould From Your VHS
It is extremely important to clean any mould off your VHS tapes before digitisation. Otherwise the quality of picture can be severely affected. Further, if you play mouldy tapes in a VCR you will contaminate the machine and — as you will presumably be using it indoors — the area in which you play it.
Breathing in the spores released by playing mouldy VHS tapes is dangerous and toxic.
If you find mould, these are the items you will to clean them safely:
- A second VCR to avoid contaminating the machine you plan to use for digitisation. As long it basically works, this can be a very cheap one, which you may be able to find at charity stores, car boot sales, eBay, etc.
- N95 mask to protect yourself from dangerous mould spores — ideally more than one.
- Disposable gloves to avoid contamination — ideally more than one set.
- An extension lead. This is so you can clean outdoors. Without laboratory-grade ventilation, this is one of the best precautions you can take to avoid breathing in mould or toxifying your home.
Apart from the last, these are the precautions that the cleaning and restoration team at EachMoment take with any mouldy VHS that they find. To then clean it, our technicians use a mixture of hand-cleaning and a proprietary, custom-made cleaning machine designed by our CEO.
How to Fix Damaged VHS — Common Repairs
Tangled or Twisted Tape
- Disassemble the Cassette: Use a screwdriver to open the shell. Refer to the above video if you’re not sure.
- Untangle the Tape: Carefully untangle the tape, avoiding creases.
- Wind It Back: Manually wind the tape back onto the reels, ensuring it is tight and even.
Broken or Damaged Shell
- Open the Shell: Unscrew and open the cassette. Refer to the video
- Transfer to a Donor Shell: Move the reels to a donor VHS shell that’s in good condition. You can use old commercial VHS that you no longer have a use for or buy VHS from places like eBay. Reassemble and tighten the screws.
Broken Tape
- Open the Cassette: Use a screwdriver to open the shell.
- Identify the Tear: Locate the broken section of the tape.
- Cut and Rejoin: Cut the damaged sections out and use clear adhesive tape to join the two good ends. Note that when not done by a professional, this can result in a loss of footage.
Sticky Shed Syndrome
This requires professional restoration services, as the repair requires specialized equipment to “bake” the tape, removing the moisture that causes the tape layers to stick together.
How to Digitise Your Tapes at Home — Finally!
In many ways this is the simplest part. Like most things done well, it is all about the preparation and knowing what to do when things go awry.
Now that you’ve gotten the perfect equipment and you’ve assessed the state of each tape, you’re ready to actually digitise!
The step-by-step instructions below are written with respect to the fact that equipment and software will vary. So make sure you read those specific instructions beforehand.
Step 1: Connect VCR to Computer
Connect your VCR to your computer using the video capture device. This usually involves connecting RCA cables from the VCR to the capture device and then connecting the device to the computer via USB.
Step 3: Install and Set Up Software
If you’ve not already, click on the file/s you’ve downloaded. Follow the set-up wizard. You may need to update some drivers on your computer.
Step 4: Test the Setup
Before you begin the digitizing process, do a test run with a tape that you don’t mind making a mistake on. This will help you confirm that both the audio and video are being captured correctly.
Step 5: Digitise
- Insert the VHS tape into the VCR.
- Initiate recording on your the capture software.
- On the VCR, press ‘Play’.
Ensure you are monitoring the process so you can stop the recording when the tape ends, or when you’ve captured the portion you’re interested in.
Step 6: Edit the Digital File (Optional)
Once the VHS tape has been digitized, use your video editing software of choice to cut out unwanted parts, add effects, create montages, or with more advanced software even enhance the quality of the video.
Step 7: Save and Backup
Save the newly digitized video in your preferred format (usually MP4 or AVI). Make sure to create backups on external drives or cloud storage services for extra security.
A Brief History of VHS Tapes
Technology moves quickly. If you wanted to preserve some much-loved memories on a home camcorder between the nineteen-eighties and the early two-thousands, the chances are they were recorded and saved onto a format such as VHS. VHS camcorders not only changed the film and television industry forever, but they also completely revolutionised the way that everyday consumers preserve their own precious memories. It seemed that anyone with a camcorder was able to definitively protect and relive their pasts for many, many more years to come.
Many versions of VHS tapes were brought to market during the 1980s and 1990s, including VHS-C used mainly for camcorders, S-VHS which boasted greater storage and quality and a variety of geographically coded VHS tapes designed to integrate best with national broadcast quality. You can read more about all kinds of VHS varieties and how to identify which VHS you have on our blog.
Following the popularity of the VHS, by 2005 it was DVDs taking centre stage for home video watching. However, VHS tapes were hugely successful for a long time and the average family accumulated plenty of them prior to their obsolescence. Convert VHS to digital to keep your family memories alive.

